Thursday, September 1, 2011
September is Here, so bring on the Fall!
Friday, August 26, 2011
Making Hand Soap
We have been collecting bars of nice soap (Yardley's, for example) anytime they have been on a good sale at CVS and Walgreens for the past couple of months. I was able to finally find glycerin in the pharmacy area of Walmart - for $2.98 for a 6 oz. bottle. Here's what you can do to make some for yourself! (For our first batch, we used English Lavender from Yardley's and then made a smaller batch of an herbal soap for the sensitive hands in our family.)
Grate one bar of soap using a regular cheese grater:
Next, add the soap flakes (you should have about 1 and a 1/2 cups) to 15 cups of water in a large pot with 1.5 tbsp of glycerin. At first, this is how it will look:
Stir regularly over medium heat until the flakes are completely dissolved. Transfer to a large container and let sit overnight. At first, we thought we did something wrong since it was kind of runny. But, after sitting overnight, it thickened right up.
We refilled our empty bottles around the house right away and it worked perfectly! They smell so good and only cost .38 worth of glycerin and .48 for a bar of soap - for the whole thing! 85 CENTS to make 15+ cups of hand soap!! We have already filled 2 bottles and have so much left over it will last for a very long time!
My next project is to make these to fill with our homemade soap:
| Source:Canning Jar Soap Dispenser |
If you try it out, let me know how it goes!
Thursday, August 25, 2011
Celebrating the Sabbath
I used My Father's World for both the girls and am so excited to be learning from it with Caleb. We are starting with Creation to the Greeks and will spend the next 3 years traveling through world history from Creation to the present day. This year, in addition to studying Bible history (I learn so much with him as we go!), ancient history, dinosaurs and the science of Creation, we are learning about the Feasts that the Jews celebrated in the Old Testament. Not just learn about them, but actually partake of them ourselves! Here's what I mean.
Last week, we learned about the celebration of the Sabbath or Shabbat as the Jews call it. So, in addition to reading about it in our lessons and Caleb reading about it in books on his own, we actually celebrated it, as much as possible, as they would have originally over the weekend - It was so wonderful! One of the great parts is that, leading up to the sun going down, everyone pitched in to clean the house so that even the mom (AKA, me) can rest on Sabbath! We all cleaned, cooked and prepared so that we would have no work to do the next day. Since it is more conducive to our lives, we started Saturday and ended Sunday, and since He is Lord of the Sabbath - we kept our eyes on Him as we celebrated.
Saturday night, as the day ended, we prepared to gather around the table. There are lots of prayers said, blessings given and received, etc. If you have never celebrated an authentic Sabbath, you really should. It is beautiful. So, we lit candles and had a pretty centerpiece, picked and prepared by Holly:
After all of the preparation, and now that everyone was truly 'starving', we began to eat. You don't know how I regret forgetting to take pictures in the midst of everything. I mean, I made a mighty fine meal! We had baked salmon with completely homemade tarter sauce (including grating the pickles for relish!), brown rice, cooked and candied baby carrots and challah - the traditional Jewish bread. It was delicious, if I do say so myself.
So, from then until the next day at sundown, you are on Sabbath rest time. Our family truly tries to keep Sunday as a day of rest anyway, so this was not too hard for us to do! Sunday morning, we woke up celebrating the Lord's presence and prepared for church. We had a great service, then came home to a lunch that we had been preparing since the day before, to avoid cooking on the Sabbath! Boy, did the house smell wonderful!
We found this recipe in a book called "Cooking the Israeli Way" and it is called Sabbath Stew. This will be a regular in our home, it was that good! I will now tempt you with a picture and the recipe, so that you can try it on your own and fill your house and tummy with amazing smells and flavors!
Here's what you need:
1 1/4 cups dry chick peas (I used 2 cans)
1 1/4 cups dry navy beans (I used dry beans for this since I had it and then cooked them til soft)
4 tbsp veggie oil
2 large onions, chopped to your liking
6 small new potatoes (I didn't have these, so I used about 6-8 idahos and quartered them)
2 lbs beef cut into 2ish inch cubes (I used stew meat)
4 cloves of garlic, minced or finely chopped
1 tsp ground coriander (did not have so did not use...)
1 1/2 tsp cumin
1 tsp allspice
1 tsp salt
1/2 tsp pepper
(Note: the recipe calls for 8 uncooked eggs in their shells. I used 2, but next time will use none. You can decide for yourself!)
If using dry beans, soak overnight the night before. Saute onions until golden brown, adding garlic at the end. In a large crockpot, place potatoes, onions, meat and eggs, if using. (Be careful not to break the eggs!) Add beans to the pot, discarding the liquid first if they were soaked. Add spices and mix well. (I waited to add my eggs until everything else was in the pot and mixed, then I gently tucked them in.) Add enough water to the pot to barely cover the contents. If your lid does not fit tightly, add a layer of foil under the lid. I turned the crockpot on at about 11 PM or so on high for about 30 minutes, then down to low and let it cook until 5 AM. I turned it off at that time, but turned it back on at 7 AM on low and let it cook til we got home from church. Alternately, you could add everything as above to a casserole dish, bake for 1 hour on 375*, then reduce heat to the lowest setting and cook for 5-8 hours. Before serving, if you used the eggs, remove them from the pot, take the shells off and cut into quarters. Serve the stew hot, garnished with the egg if desired, and have some of the challah with it. Oh so good, filling, nutritious and just plain yummy!
So, after that, we rested, spent time together reading, playing outside, etc. We had a light dinner of cheese and crackers, then waited for the sun to go down. There are more prayers prayed at that time and more symbolic celebrations as well. It was a wonderful day - so good that we are considering doing it again. Soon! I wish I had taken more pictures, but we were just so caught up in the time, that it slipped right by... Maybe next time!
This weekend was just a testimony of one of the many reasons that I love to homeschool. Getting to bring things to life and make them real and meaningful for my children - not just facts to memorize for a test, but a true love for learning and wisdom and truth. I am blessed!
Wednesday, August 24, 2011
Caleb turns 12!
Another birthday? Where does the time go???!! We are so blessed to have Caleb in our family - he keeps us laughing with his infectious humor and laugh. He is truly a gift from God!
His sisters think so, too!
You may know that part of how we celebrate a birthday in our home is by letting the birthday person get to choose all the meals we eat that day and what we do as a family. We did a tiny bit of school in the morning, played a game and then he played airsoft war with his daddy. After that, he wanted to watch a movie of his choice, so that's what we did!
Sometimes the food choices can be very interesting! He chose to have:
Breakfast - Homemade Biscuits and Gravy
{Note: This was the best gravy I ever made! I made homemade turkey sausage and also used part milk and part 1/2 and 1/2 (because I ran out of milk - I love when accidents make something so much better!). I don't know if it was one or the other or both reasons, but it was yummy! And on top of homemade biscuits??? Not much better than that!}
Lunch - Quesadillas
{Funny that he chose this since we have them several times a week as part of our regular meal plan - but we just looooovvveee them!}
Dinner - Homemade Fried Chicken, Mashed Potatoes, Green Beans and Baby Carrots
| Dinner on our Special Birthday Plate |
| Caleb snapped this picture of me working - notice the messy kitchen... this was a big job! |
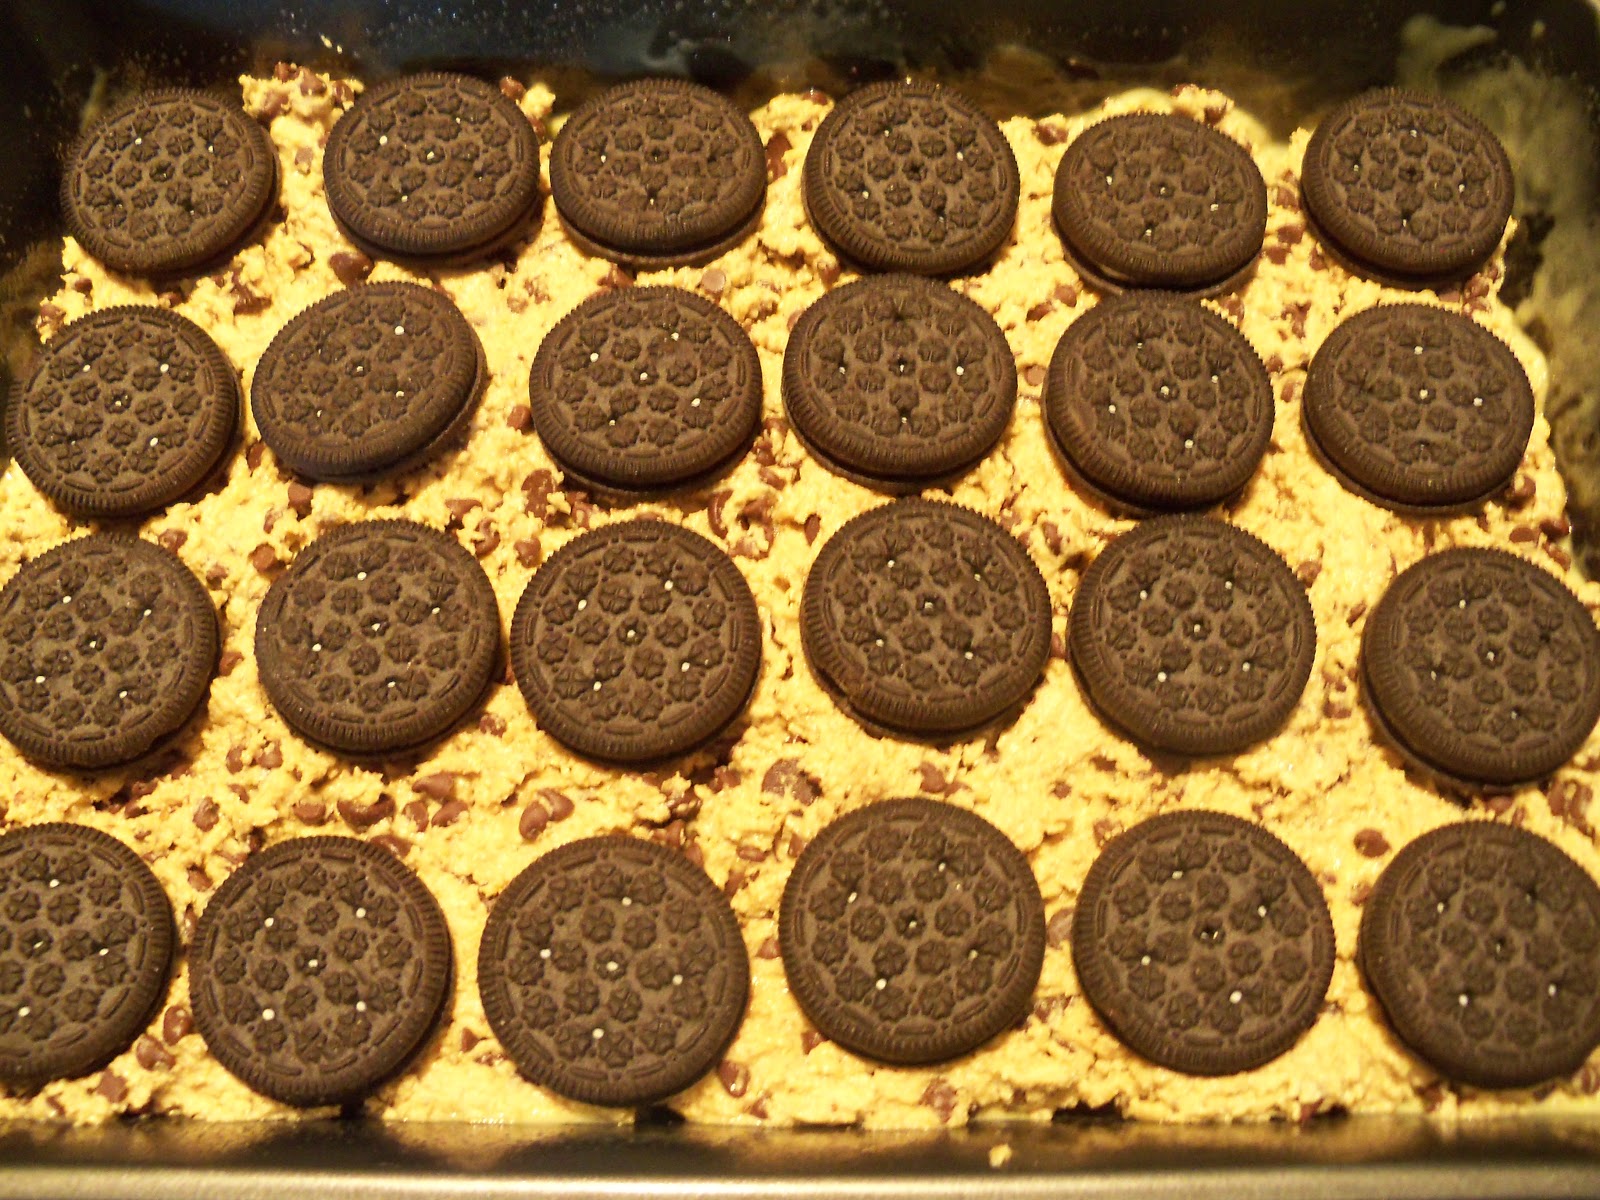
So, first you make a batch of your favorite chocolate chip cookie recipe and spread it in the bottom of a well greased (or parchment lined) 9x13 pan
| Homemade chocolate chip cookie layer |
As if you needed more, you now add your favorite brownie mix on top of that (I actually cheated here and just used a box mix. Sometimes, you just have to cheat!)
Then, you bake it for about 50 minutes at 350* Take it out and it looks something like this:
Serve it warm with vanilla ice cream and chocolate and caramel syrup - because it wasn't bad enough on it's own.
I could only take one bite (don't need an upset stomach over dessert!), but it was very good. Tasted like a brownie on steroids. Caleb loved it though, and that's what counts!
Happy Birthday to Caleb! I think this will be his best year yet and pray that it is so!
Tuesday, April 5, 2011
Strawberry Season
Today, we made another of my favorites - Strawberry Spinach Salad - Fresh spinach, sliced strawberries, chopped pecans, cranberries, croutons (if desired) and your favorite dressing. To me, it goes best with either a vinaigrette like Raspberry Pomegranate or Poppy Seed. This is what our lunch looked like:
Those are all just to name a few of the many ways we enjoy strawberry season. If you have any amazing ways you use them, I would love for you to share!
Tuesday, February 1, 2011
Homemade Magic Shell
1/2 c. coconut oil
1 bag of any type of chip you like - semi sweet, dark, mint, butterscotch, etc.
Melt the coconut oil in a saucepan on the stove. Add the chips just until melted. Allow to cool and then devour over ice cream!
This works perfectly because coconut oil solidifies when it gets cold. Plus, you get the added benefit of the health goodness coconut oil offers.
Enjoy!
Tuesday, October 26, 2010
Passionate for Pumpkin 2
Pumpkin Pancakes
2 c. flour (fresh milled soft wheat, sometimes some oat flour too - just throw some oats in the blender til flour consistency. I have used up to 1/2 oat flour before)
3 Tbsp. Brown Sugar
2 tsp. baking powder
1 tsp baking soda
1 tsp. pumpkin pie spice
1 tsp. allspice
1 tsp. cinnamon
1/2 tsp ginger (with all of these 3 spices, I err on the side of 'a little more!')
1/2 tsp. salt
1 1/2 c. milk (almond)
1+ c. pumpkin puree
1 egg
2 Tbsp. vegetable oil
2Tbsp. vinegar
(1/2 c. ground flax - optional)
Mix together the pumpkin, milk, egg, oil and vinegar. Combine the flour, brown sugar, baking powder, soda, salt and spices. Stir into the pumpkin mixture just to combine. Adjust the thickness by adding additional milk if needed. Heat a lightly oiled griddle or frying pan over medium high heat. Pour or scoop onto the griddle. Brown on both sides and serve hot with homemade
Cinnamon Brown Butter Syrup:
1/2 c. butter, cubed
1/4-1/2 c. maple syrup
1/2+ tsp. cinnamon
1/4-1/2 tsp. nutmeg
1/2 c. chopped pecans, toasted (optional)
In a small, heavy saucepan, cook butter over medium heat for 8-10 minutes or until golden brown, stirring often (this will burn quickly if it goes too far!). Add the maple syrup, cinnamon and nutmeg. Remove from heat and stir in the pecans, if desired.
I am telling you - this is good stuff! No picture this time, though - they went too fast!
I have a tender tummy, so I can't eat these for breakfast, but I made them for dinner the other night, and they were a huge hit. One more reason to love pumpkins!
Tuesday, October 19, 2010
Passionate for Pumpkin
Just for you (not me, really...) - (ok, maybe a little!) - I have decided to try many new pumpkin recipes over the next few weeks and then post about them here with my comments. Then it will be your turn - for your family, of course - to get in on the action! Today, I tried a recipe that was just amazing. So, we will kick it off with this one. (I put in parenthesis the actual ingredients that I used instead of the original recipe.)
Pumpkin Crumb Coffee Cake
adapted from All You magazine
Topping:
*1 c. all purpose flour (fresh ground soft wheat)
*1/2 c. packed brown sugar (sucanat)
*pinch of salt
*1 1/2 tsp cinnamon (2 tsp.)
*6 Tbsp. unsalted butter, cold, cut into pieces
Cake:
*2 c. all purpose flour (2 1/2 cup fresh ground soft wheat)
*1 1/2 tsp. baking powder (almost 2 tsp.)
*1/2 tsp. baking soda (more like 3/4 tsp.)
*1/2 tsp. salt
*1 Tbsp. cinnamon (well rounded)
*2 tsp. ground ginger (1 tsp. ground and 1 tsp+ fresh)
*1/2 tsp. nutmeg (+ a little)
*1/3 c. vegetable oil
*3/4 c. unsweetened applesauce (3/4 c. kefir)
*1 15 oz. can pumpkin
*1 tsp. vanilla (+ a little more)
*1 1/2 c. sugar (1 c. sugar and 1/2 c. honey)
*1/2 c. packed brown sugar (1/2 c. sucanat)
*2 large eggs, at room temp, lightly beaten
(I forgot to put flax in - don't know what was wrong with me! Normally (and from now on) I would add at least 1/2 c. of ground flax as well.)
Make the topping: In a bowl, stir together flour, brown sugar, salt and cinnamon. Add butter and combine with fingertips until the mixture is crumbly. Refrigerate while making the batter.
Preheat oven to 350*. Grease a 9x13 cake pan. In a small bowl, combine flour, baking powder, baking soda, salt and spices. In a large bowl, whisk together oil, applesauce, pumpkin, vanilla and both sugars until well mixed. Whisk in eggs. Add flour mixture to pumpkin mixture and stir just until combined; do not overmix. Pour batter into cake pan and spread evenly. Sprinkle the reserved topping evenly over the top.
Bake the cake until a toothpick inserted in the center comes out clean, about 45 minutes. Allow to cool on a wire rack about 20 minutes. (I never read that part and we ate it pretty much as soon as it came out of the oven! Ooppsss!!!) I had mine with some of my {free} pumpkin spice coffee, creamed with {almost free} caramel vanilla latte creamer - ohhh, boy, what a treat!
Saturday, October 9, 2010
A Couple of Pumpkin Recipes
1 cup old fashioned oats - not quick cooking
1 tbsp ground flax seeds
2 1/2 tbsp brown sugar
1/2-3/4 tsp cinnamon
1/4 tsp allspice
1/2 tsp nutmeg
1 tsp vanilla
2 tsp butter, softened
3/4-1 cup pumpkin puree
3/4 cup milk (we used almond - use your favorite!)
Topping:
1/2 cup chopped pecans
3 tsp. softened butter
2 tbsp brown sugar
Preheat the oven to 375* and grease 4 individual ramekins - then set them aside. Combine the oats and the salt. Add the rest of the ingredients and mix thoroughly. Divide the mixture evenly between the 4 ramekins. Place the ramekins on a baking sheet (this makes it easier to get it in and out of the oven) and bake at 375* for about 10 minutes. Now, while that is cooking, combine the ingredients for the topping. After the oatmeal has baked, remove and divide the topping evenly over each one, then bake for an additional 7 minutes. Cool for 5 minutes before serving. We added an extra splash of almond milk to it before we ate it, just to add to the creaminess.
That's it! I had never had a baked oatmeal before, so I was a little nervous. And I must admit that the first bite was different, as far as comparing the texture of regular oatmeal to this. But, it was intriguing enough to go back for another and before I knew it, my ramekin was empty! It was not too sweet, but had just the right combination of hearty, autumn yummy-ness to make this a definite keeper! Here's what ours looked like (before consumption!)
You owe it to yourself to try this!
Another of our new favorite fall recipes is Pumpkin Chocolate Chip Cookies. They are denser than a regular cookie - more like a scone or cake-like. You have to try these too! Here's what you do:
1/2 cup butter
1 1/2 cups sugar
1 egg
1 cup pumpkin
1 tsp vanilla
2 1/2 cup flour
1 tsp baking soda
3/4 tsp baking powder
1 tsp cinnamon
1 tsp nutmeg
1/4 tsp salt
3/4 cup chocolate chips
Preheat the oven to 300* - not a typo! You will bake them this low to get them just right. Next, cream the butter and sugar together until light and fluffy. Beat in the egg, pumpkin and vanilla. Mix in the flour, baking powder, baking soda, salt, nutmeg, and cinnamon. Add the chocolate chips and mix thoroughly. Scoop cookies onto an ungreased cookie sheet ( I make them kind of smallish). Bake at 300* around 22-24 minutes (a little less if smaller). Remove from the oven, let sit for a minute or so and then place on a rack to cool. Oh, and try not to eat too many at once!
Well, I have some more, but that is enough to get you started - so get to the kitchen and cook up some good things for your family!
Monday, March 1, 2010
Bread Machines
I was in a store the other day near some bread machines that were for sale. There was a couple near me, looking at various things and the husband pointed out the bread machines, asking her if she wanted one. Her response was so similar to many that I hear. "No, I had that one a long time ago and never used it (used it only once or twice, etc.). They are just a waste of money."
I reflected on buying my first bread machine after I heard this discussion. I bought a cheapie machine at Wal-Mart soon after my wedding and did as the lady at the store said - I used it once. The bread was horrible and after that, if I made bread, I made it completely by hand.
Then, a few years ago I was at my local Homeschool Convention. As I walked into the vendor hall with a friend, an amazing scent filled my senses and I think I literally floated to the booth in the far back corner of the massive hall. The booth was for a company called Bread Beckers and I believe that I spent most of the rest of my time at that convention at their booth - watching, asking, talking, listening, learning and, yes, tasting! I left there changed on my views of bread making, but didn't buy a thing. I did take a free CD that heralded the health benefits of eating bread made from freshly ground wheat, though. I didn't need much convincing. Always being one to look for new ways to take care of the temple that God dwells in for myself and my family, I consistently and diligently search for ways to reach this goal. Not to mention, the things I tasted were amazing!
Mark and I were blessed to sell a house that year, the year of the great rise in prices, and we made a nice profit. We talked about it, analyzed the cost vs. the benefit to our family, and decided to take the plunge and get the things we needed. We went back to the Bread Becker's booth at another Convention nearby and purchased the Zojirushi Bread Machine as well as the Nutramill to grind our own flour. It sounds so Little House on the Prairie-ish to write that, but I love it! The fresh ground flour makes everything taste better and fresher and it feels so good to know that I am putting unprocessed, whole wheat grains in my family.
So, what about the bread machine - do we use it or did I use it once and that was it? The truth is, I use my machine at least several times a week, even though I take my dough out and bake it in the oven (simply because I like the shape I can make by hand better). I trust this machine to take the wholesome ingredients I put in it and mix them thoroughly and properly for a perfect dough. Then, I am able to make rolls, bread, pizza crust, cinnamon buns, sandwich pockets, etc. The possibilities are only limited by my creativity and time! If I didn't have the bread machine, I would like to think that I would still consistently bake bread, even by hand, but I know that there would be times when reality would take over in the busy-ness of life and it would be easier to stop and buy a loaf. The machine helps me to continue making bread at home when I just have to throw the ingredients in the pan and go about my business.
So, when I hear people talk about what a waste bread machines are, I feel sad for all that they miss out on by using this amazing kitchen tool. Here is my favorite bread recipe, in case you were wondering! :D
1/3 c. olive oil
1/3 cup honey
2 tsp. salt
1 tsp. gluten
2 Tbsp. lecithin
1/2 c. flax meal
4-4 1/2 c. freshly ground hard red flour
1 Tbsp. instant yeast
Pour the water, olive oil and honey into the bread machine. Add the salt, gluten, lecithin, flax and about 4 c. of the flour, in order. Make a small well in the top of the flour and add the yeast. Place in the bread machine.
Bake at 350* for 20 minutes, remove and let cool on a wire rack.
Fresh out of the oven. I wish you had smell technology on your computer, cause this is pretty much amazing!
BTW - I mentioned that sometimes we use the dough to make pizza. Sometimes when I am making bread, instead of making the three rolls, I use that dough and make beauties like this for lunch. Yeah, homeschooling is tough sometimes!
Tuesday, February 9, 2010
Homemade Bread
Isn't it beautiful??!! So, here's the recipe:
4-4 1/2 c. flour 3 Tbsp. sugar
4 1/2 tsp. yeast 2 tsp. dried dill weed
2 tsp. basil 1 1/2 tsp. salt
3/4 tsp. garlic powder 1 egg
3/4 tsp. rosemary, crushed 3/4 c. milk
1/2 c. water 1/4 c. butter, cubed
1 tbsp. butter, melted
(This is how I made it using a bread machine to mix. You can also mix the dough by hand, if you like.)
Place the milk, water and cubed butter in the microwave until the butter melts, to about 120*. (Don't allow to get too hot or it will kill your yeast!) Pour this into the bread pan. Add all of the seasonings next, then add about 4 c. of the flour. Make a small well in the top of your flour and place the yeast in the well. Knead in the bread machine for 10 minutes. I keep an eye on it and see if I need to add more flour, so that it forms a nice ball and is not sticky. When done mixing, let rest for 10 minutes. (If you are not doing this in a machine, make sure it rests in a warm place.) After 10 minutes, divide the dough into 1/3's , shape each section into a rope and then braid on a greased baking sheet. Pinch the ends and tuck under. Cover and let rise until double, about 25 minutes. This gets huge!!! And so pretty! Bake at 350* for 20-25 minutes until golden and brush the top with the melted butter. We have eaten this with butter on it and we have also done this:
Dipped in olive oil that has a little pepper in it (like Macaroni Grill!). Mmmmm, mmmmm... this bread just has an amazing flavor. I have been out of rosemary, so I still haven't tried it with that. The last time I made it, I had run out of dill, so I used some thyme and it was still good. I have also been adding extra garlic powder and minced garlic as well, just because we like it like that - you can modify it with herbs and spices as you desire. Also, it made me think of pizza crust, in a way, so this week, we will be using the same recipe to make homemade pizza. I'll let you know how it turns out! Let me know if you try it and ENJOY!
Tuesday, December 22, 2009
Baking Day
Quick post after a LONG baking day!! The kids and I spent the day in the kitchen making all kinds of goodies. For now, we have pumpkin whoopie pies, chocolate whoopie pies, haystacks, peppermint candy bark, white chocolate cranberry cookies, pecan tassies, angel whispers and sugar cookies. I think that we will still make chocolate chip (my brothers' favorite) and maybe one more. I LOVE to bake!! The kids all helped (most of the day!) and after lots of messes, clean ups, dishes (did I mention that my dishwasher is not working right now??!!), more messes, more clean up and lots of delicious smells, we were able to wrap some things up to give away and call it a day.
Wednesday, June 17, 2009
The Most Dangerous Cake in the World...
5 Minute Chocolate Mug Cake
4 Tbsp. flour
4 Tbsp. sugar
2 Tbsp. cocoa
1 egg
3 Tbsp. milk
3 Tbsp. oil
3 Tbsp. chocolate chips
a small splash of vanilla extract
1 large coffee mug
Add dry ingredients to mug, and mix well. Add the egg and mix thoroughly.
Pour in the milk and oil and mix well. Add the chocolate chips and vanilla and mix again.
Put your mug in the microwave and cook for 3 minutes at 1000 watts (high).
The cake may rise over the top of the mug, but don't be alarmed! (none of ours ever did, but we used pretty big mugs!)
Allow to cool a little, and tip out onto a plate if desired.
EAT! (this can serve 2 if you want to feel slightly more virtuous).
The kids "suffered" through it!
Now, why is it called the most dangerous cake recipe in the world? Because now we are all only 5 minutes away from chocolate cake at any time of the day or night! OK, print this out and go try it for yourself, then let me know what you think!
Monday, May 4, 2009
Homecooked Dinner - Recipes Included!
Whole Wheat French Bread Rolls
1 1/2 c. warm water
1 tbsp. active dry yeast
2 tbsp. white sugar
2 tbsp. vegetable oil
1 tsp. salt
4 c. flour - (I used fresh milled hard white wheat)
In a large bowl, stir together the water, sugar and yeast. Let stand about 10 minutes. Add the oil, salt and flour. Turn out onto a floured surface and knead til smooth and elastic, about 8 minutes. Lightly oil a large bowl, place the dough inside and turn to coat. Cover and put in a warm spot til doubled, about an hour. Deflate the dough and divide either into about 16 balls for rolls or in half for loaves. I did 2 loaves. Place them onto greased pans, cover and let rise til double, about 40 minutes. Bake for 18-20 minutes in preheated 400 oven or til golden.
Here is a picture of my bread:
Penne and Chicken with Garlic Cream Sauce
4 medium boneless, skinless chicken breasts
1/4 tsp. salt
1/8 tsp. black pepper
12 oz. penne pasta (I used whole wheat)
2 zucchini halved and sliced
2 c. mushrooms (or one small can)
2-3 cloves garlic, minced
1 tbsp. olive oil
2 c. chicken broth
2 tbsp. flour
8 oz. cream cheese
2-3 tbsp. parmesan or romano cheese
Place the chicken in a skillet and lightly salt and pepper it, then saute it til done, but do not overcook. Or, you can grill it. Cook pasta according to package and drain Return to pan, cover and keep warm. In a large skillet, cook zucchini, mushrooms and garlic in oil over medium heat about 5 minutes or til veggies are crisp tender. Add veggies to pasta. In the same skillet, whisk together the broth and four, then add cream cheese. Cook and stir til smooth and bubbly, then add the parmesan and cook another minute. Add to the pasta and toss. Cut chicken into bite size pieces or strips and arrange over the pasta. Sprinkle with parsley and more cheese if desired.
Add whatever veggie you like - we had a mix of brocolli, cauliflower, baby carrots and squash. Mmmmmm, so yummy!! Now, for dessert!
French Silk Pie
1 c. butter
1 1/2 c. white sugar
6-8 tbsp. unsweetened cocoa powder
2 tsp. vanilla
4 eggs
1 9" pie crust (your choice - graham, chocolate or regular - we use homemade graham)
Cream the butter and sugar - only enough to mix them together - do not overmix! Blend in the cocoa - start with 6 tbsp. and taste. You want it slightly stronger that you want the completed pie to taste. Then add the vanilla. Beating at high speed, add one egg at a time and beat until thoroughly incorporated, about 5 minutes. Keep whipping until light and fluffy. Spread in the pie shell of choice and refrigerate. Top with whipped cream.
Oh, my - this was a yummy evening! Now, I better get back to work - hope you enjoy this as much as we did!
Monday, March 2, 2009
Yummy Dinner
Slice open the sausages down the middle and either grill or broil til golden. Melt the butter and add the onions. Saute til soft and translucent. Add the apples, vinegar, brown sugar, salt and pepper and saute til carmelized. This takes 10-20 minutes (or more, depending on your stove!).
Now, to put it together. We make brown rice with this and put a small mound on the plate. Put the apples and onions on top, then a sausage link. Tonight, we served this with veggies - brocolli, cauliflower, squash and baby carrots. Here is a picture:
So yummy and satisfying! Enjoy!
Monday, October 6, 2008
Dinner in a Pumpkin
You have to cut off the top (I did this for Holly!) and scoop out all the insides. Be sure to save the seeds to roast! Then, in a large skillet, combine:
1 1/2 lbs. ground beef/turkey
1/3 c. chopped green pepper (didn't have any, so not in this time)
3/4 c. chopped onion
Combine over medium heat until the meat is browned. Then, add:
1 tsp. salt
1/4 tsp. pepper
1/4 c. soy sauce (or liquid aminos, like we use)
2 Tbsp. Brown sugar
1 4 oz. can mushrooms
1 can cream of chicken soup
2 c. cooked rice (brown is best!!)
Mix this all well and then place inside the pumpkin. Place the lid on the pumpkin and then put the pumpkin on a foil lined cookie sheet. Bake at 350 for 1 1/2 hours.
Now, when I first read it, I have to admit that is sounded weird to me. But everything was so good. When you take it out of the oven, the pumpkin is so pretty and browned:
When you scoop it out, be sure to get some of the cooked pumkin too. It adds tons of extra nutrients, has hardly any flavor at all, and makes you feel all good and warm inside knowing how good for you it is! EVERYONE in my house loved this - even Caleb! The girls loved the insides so much, that they want to make it even when it is not fall without the pumpkin. So, I hope you get to try it. Let me know if you do and what you think! Bon appetite!
Thursday, September 25, 2008
Do NOT read if you are lactose intolerant!

Thursday, May 22, 2008
BLUEBERRIES!
The Boys (Jonathan, Devin, Colin, Caleb and Braden)
The Girls (MaKenna, Priscilla, Megan, Caitlin, Katie, Holly and Amber)